Two more clear nights in Boston. The weather has been very good since I left California! I didn’t have time for a second camping dry-run, so I set up the telescope in the backyard (a very small backyard) near the basketball hoop.
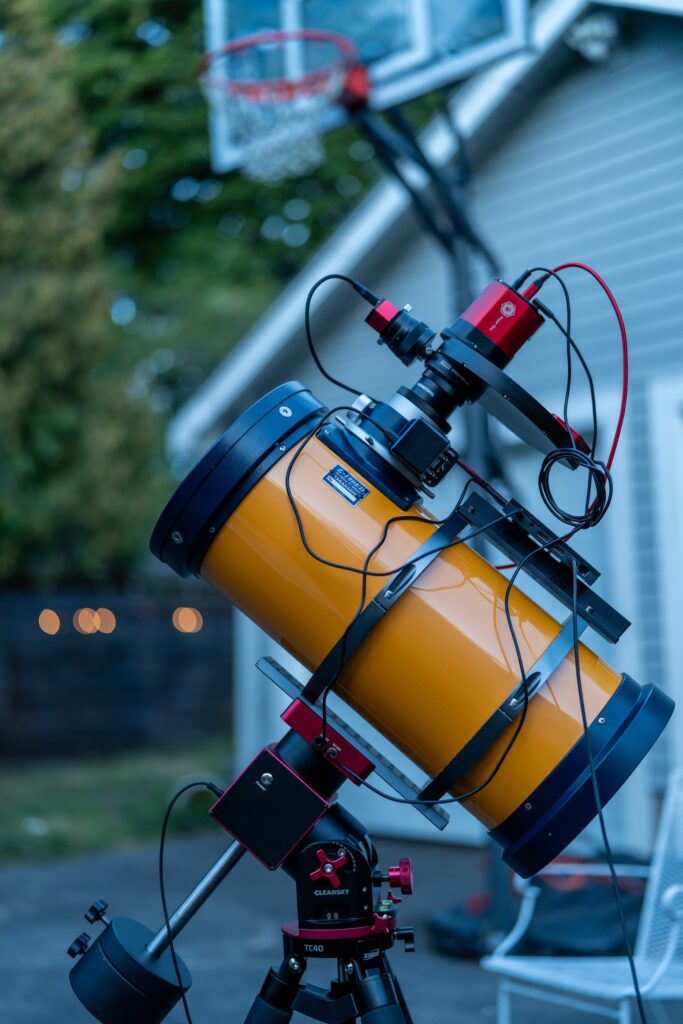
Same telescope, camera, mount, and focuser as my previous post. But I have swapped in the 1.5x extender, which brings the focal ratio down to f/4.3. That way, I can effectively use narrowband filters for SHO imaging (see this post for explanation). SHO is pretty effective with my 5nm filters, even under strong city lights.
Question Mark Nebula
For the first target, the Question Mark Nebula, I started imaging around 10:00, and went all the way to 5:00, for a total of around 6 hours of data (I lost an hour due to filter changes, refocusing, bad frames, and some issues with post-meridian-flip alignment). That includes roughly 1.5 hours of LRGB and 1.5 hours each of Sii, Ha, and Oiii.
First, here is the LRGB image. Despite the city lights and no filtering, this turned out pretty good. You can see a circular halo around the nebula, though. I don’t know if this is due to imperfect gradient correction or scattering from a nearby house light, but that would probably go away if I redid this image from a dark site.
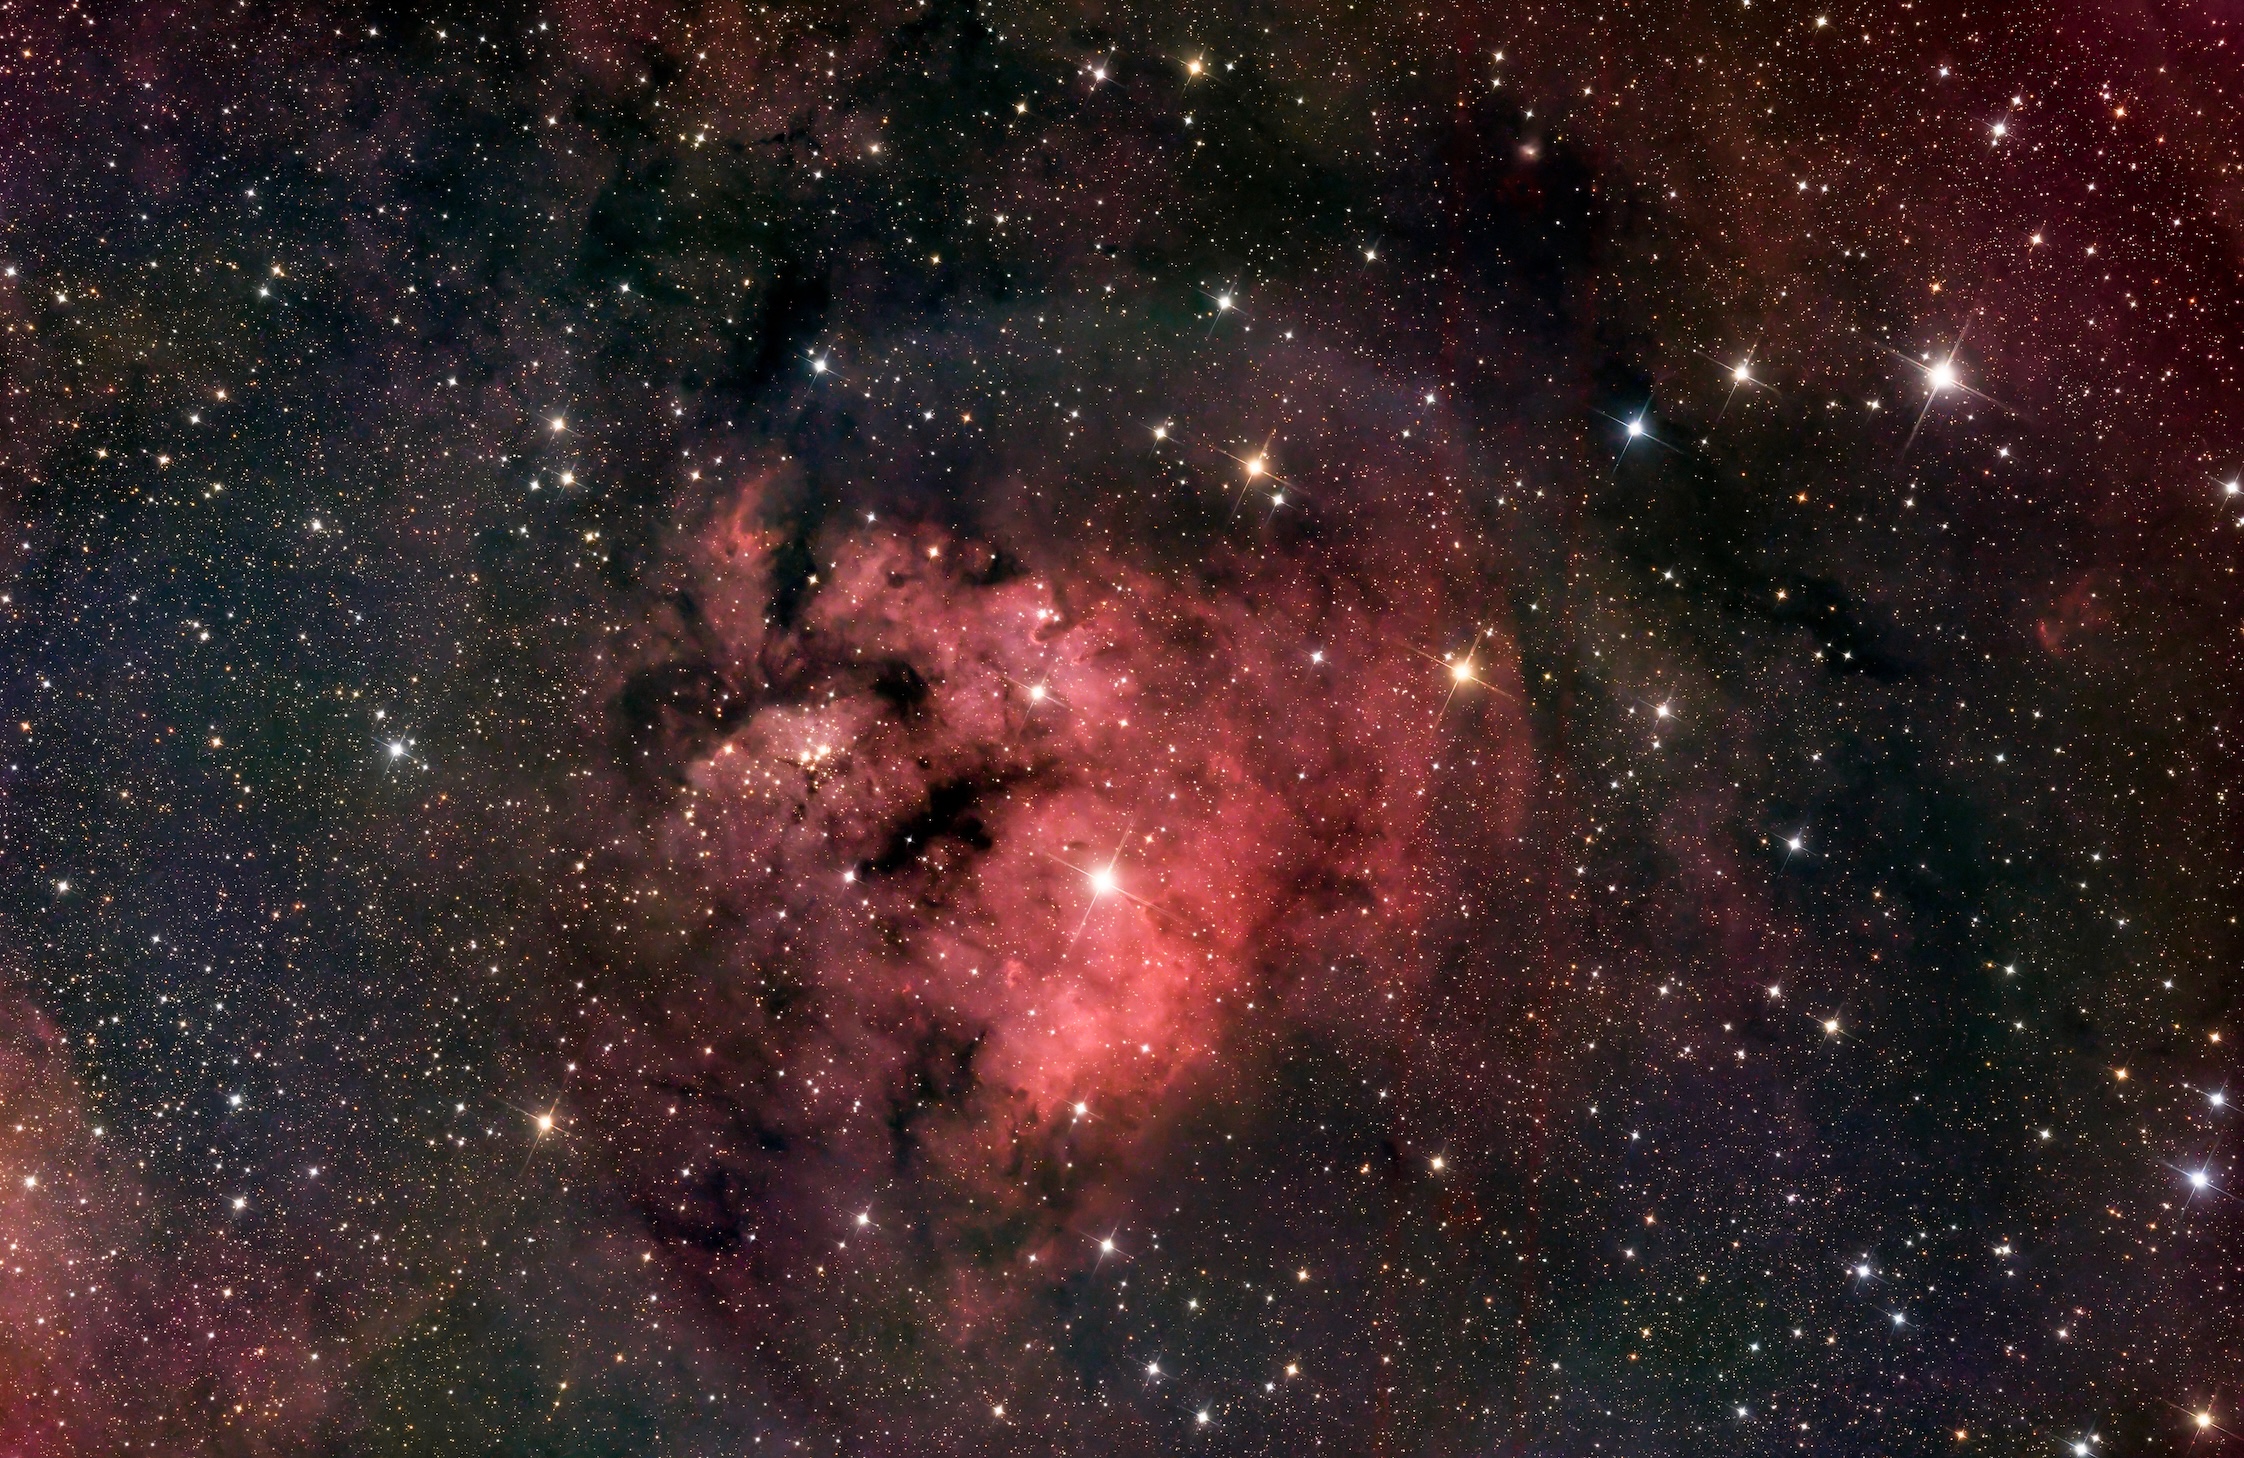
The first “question” here is: where is the question mark? Is it the black clouds in the middle of the nebula, to the left of the bright two stars and to the right of that small star cluster? If so, it looks mirrored. But viewed from a refractor or an SCT, it would be upright.
Now here’s the picture in SHO, following the Hubble palette, with LRGB stars.
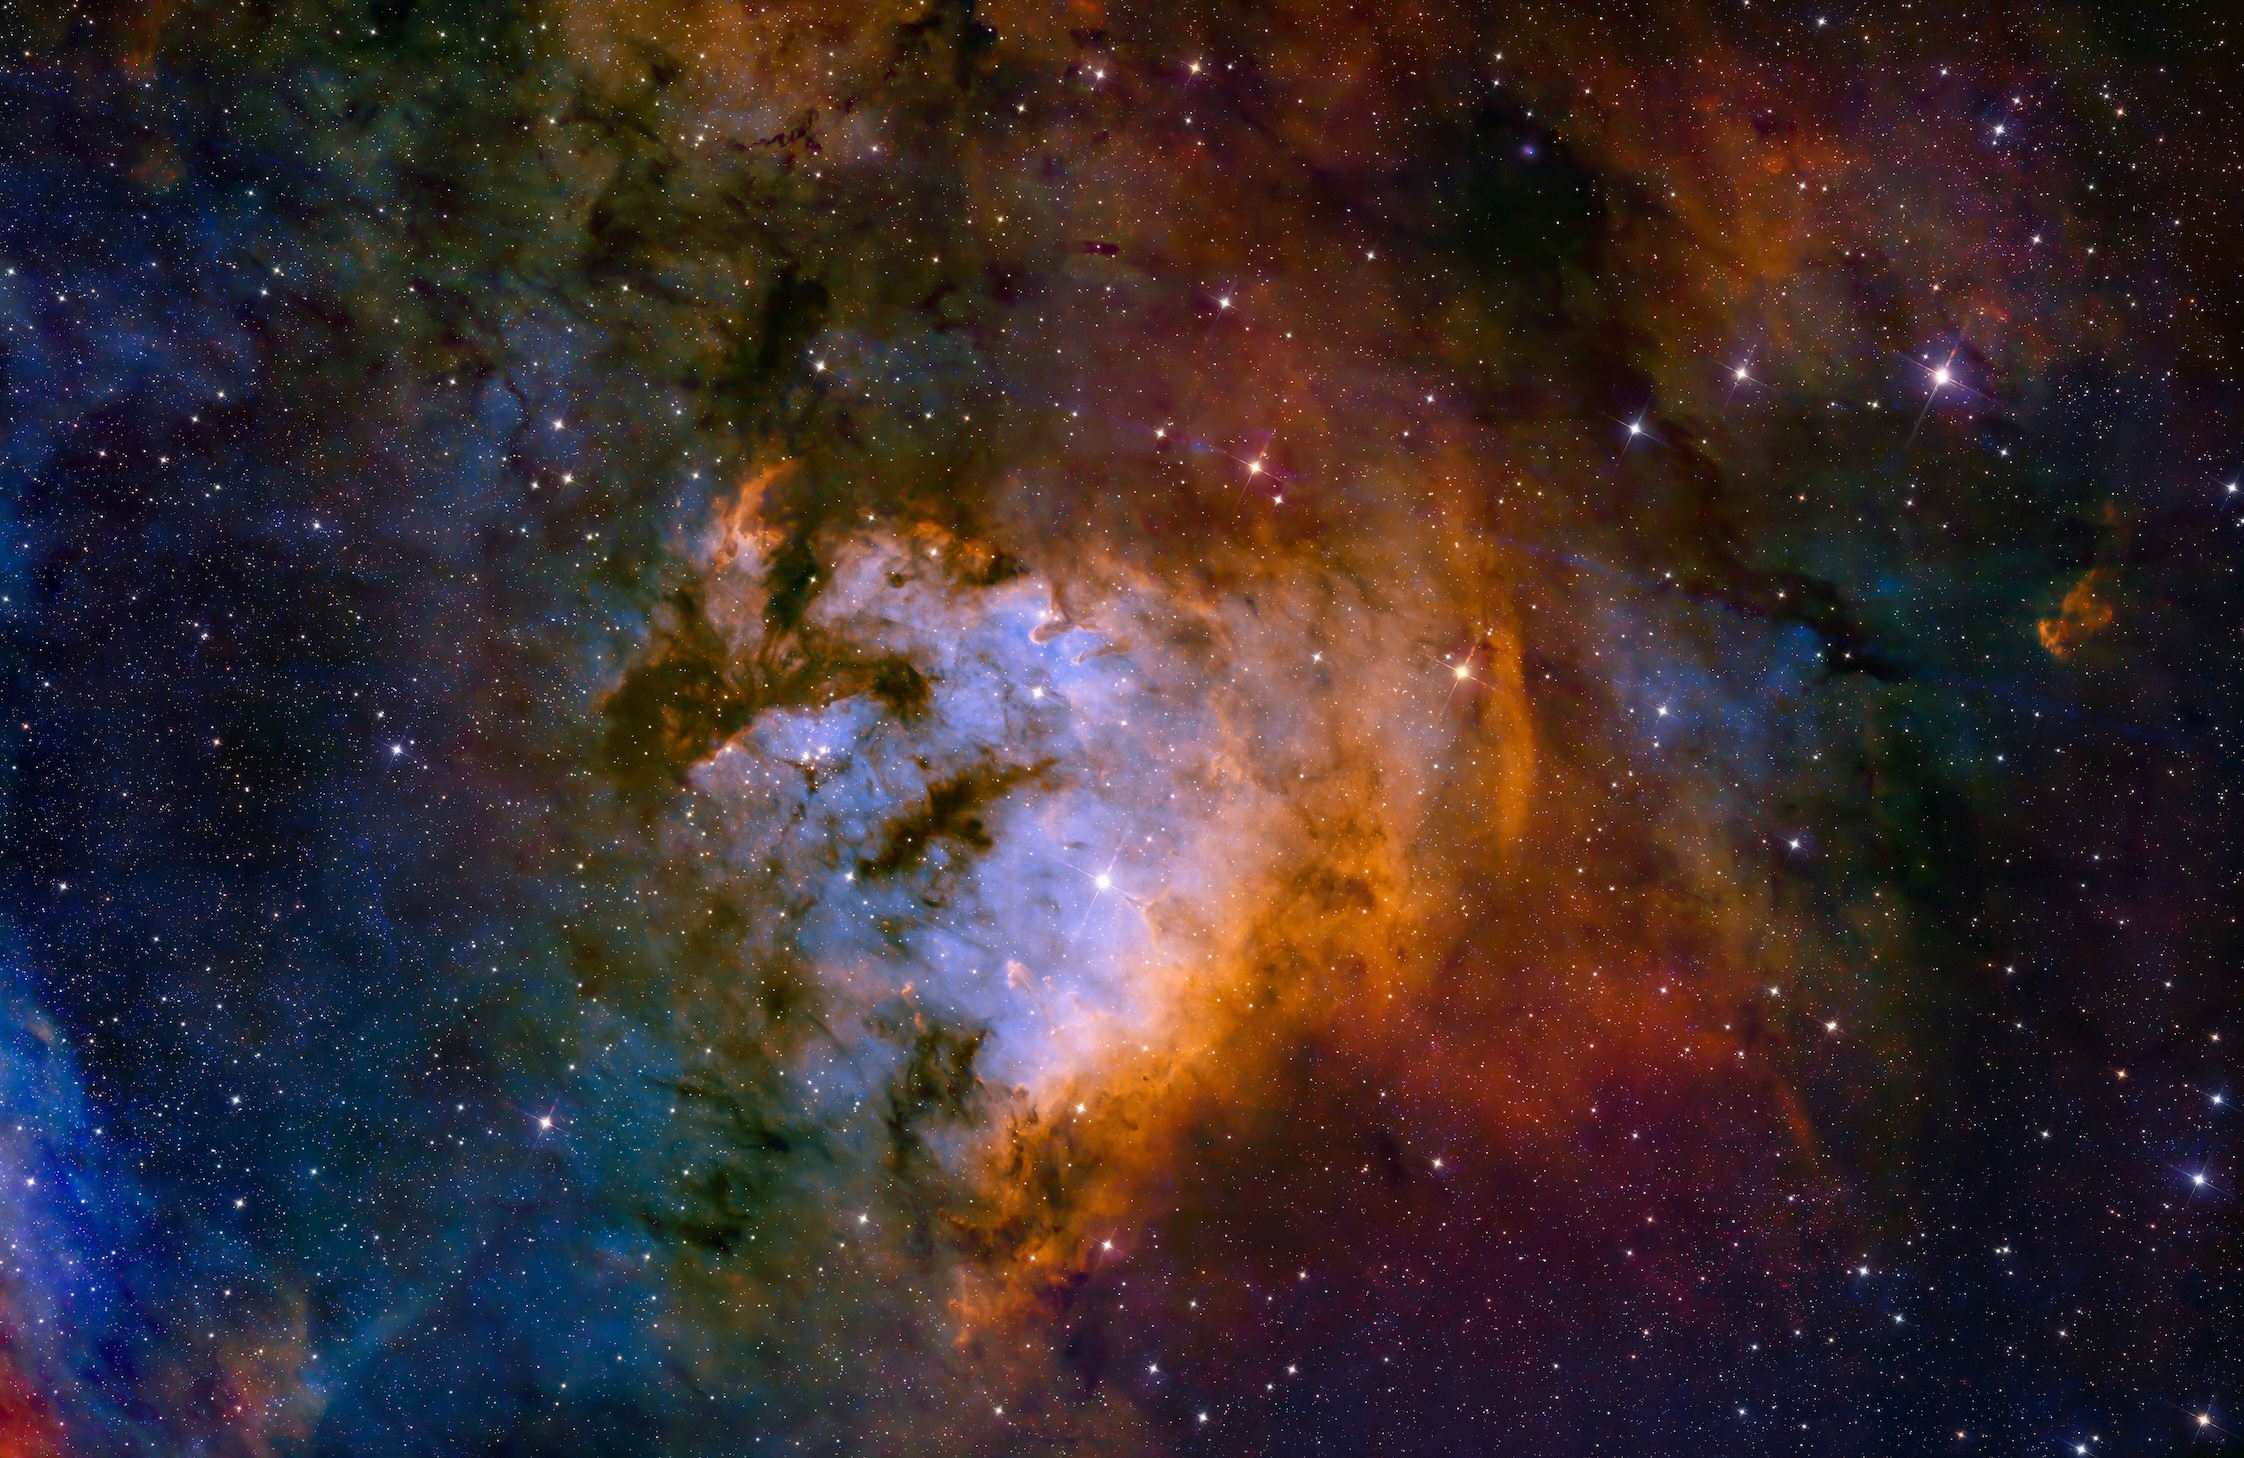
I had to tweak the curves a bit to bring out the red glow, while still preserving the yellows and blues. In general, SHO imaging requires artistry. Images come back overwhelmingly green due to Ha dominance. Using unlinked stretch, you can balance the colors, but images still often feel like they have a green haze. SCNR is a hammer that can obliterate green haze, but removes all the green from an image, which can be undesirable and sometimes also removes detail. Also, I’ve done a lot of editing where I just end up with a yellow-and-brown product that looks like cosmic barf. But I think that this object turned out pretty nice.
Here are two zoom-in shots of the nebula.
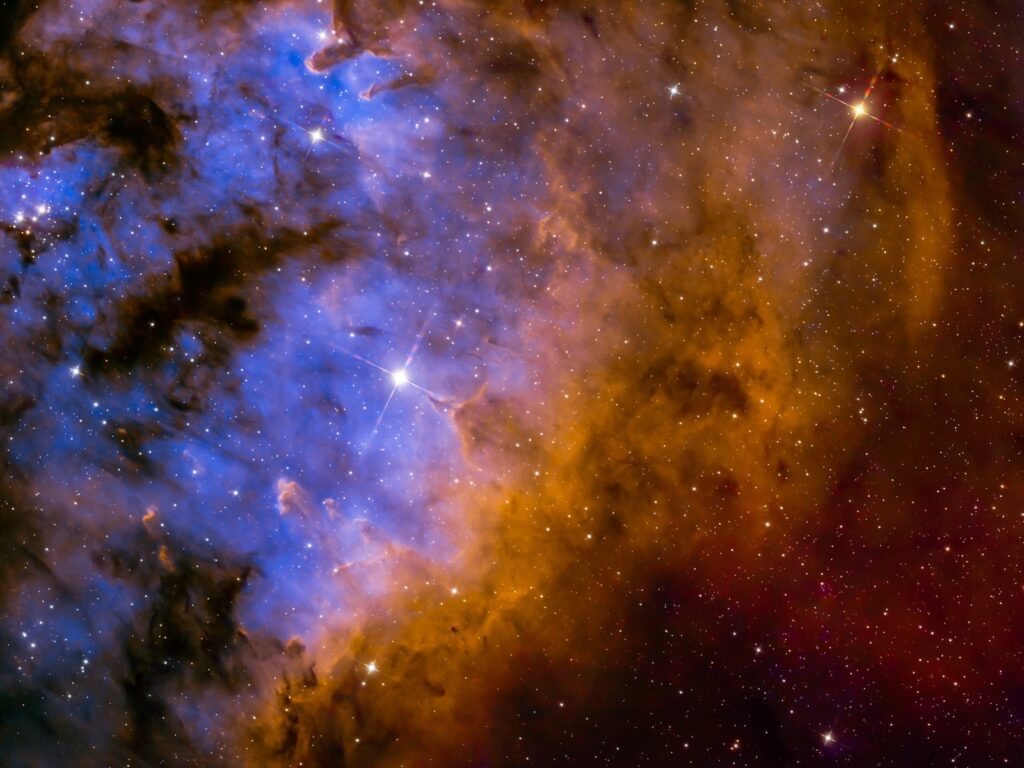
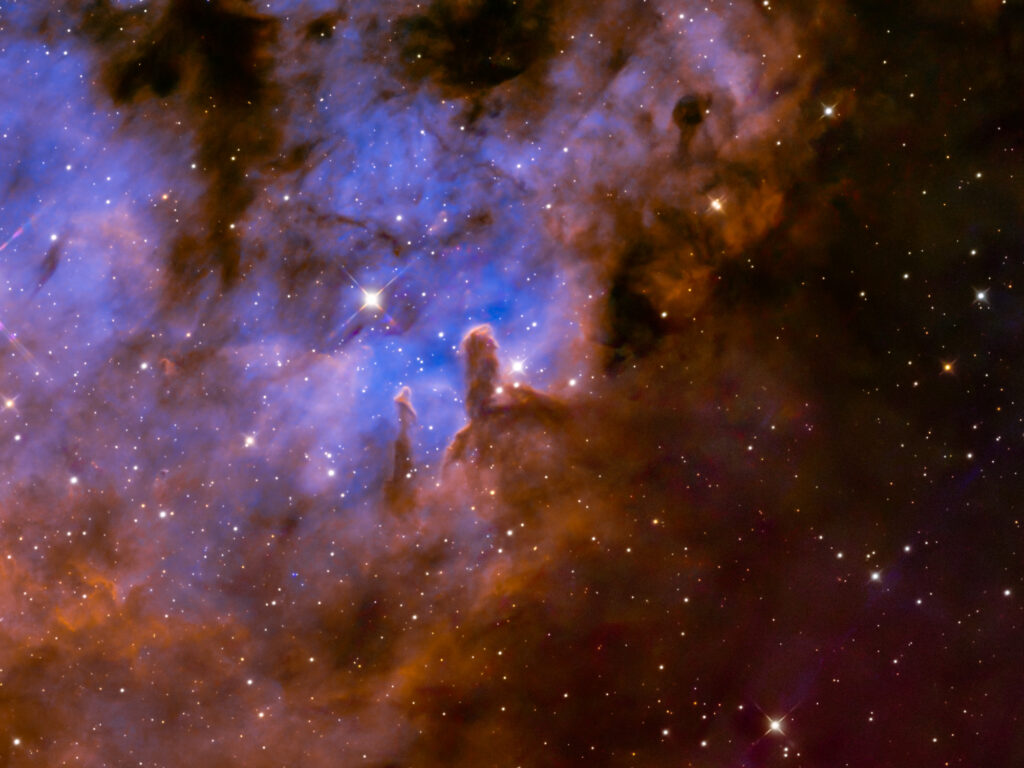
The second “question” is more troubling. Look closely and you can see double diffraction spike pairs on each star. Here are examples from the present image, as well as the Dark Shark Nebula taken last weekend.
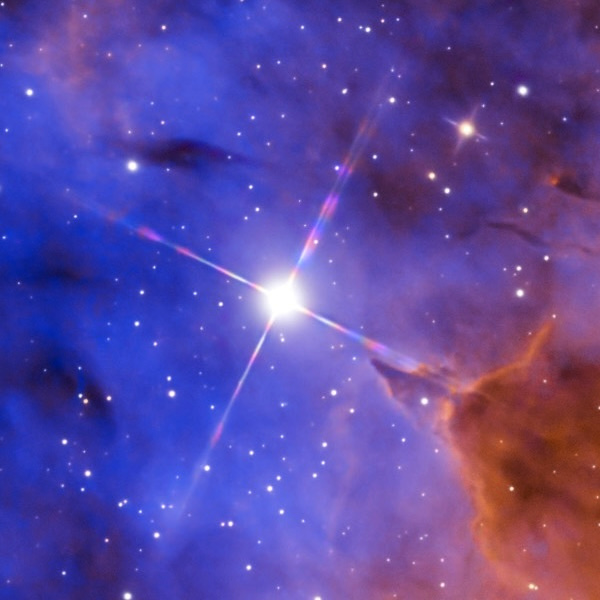
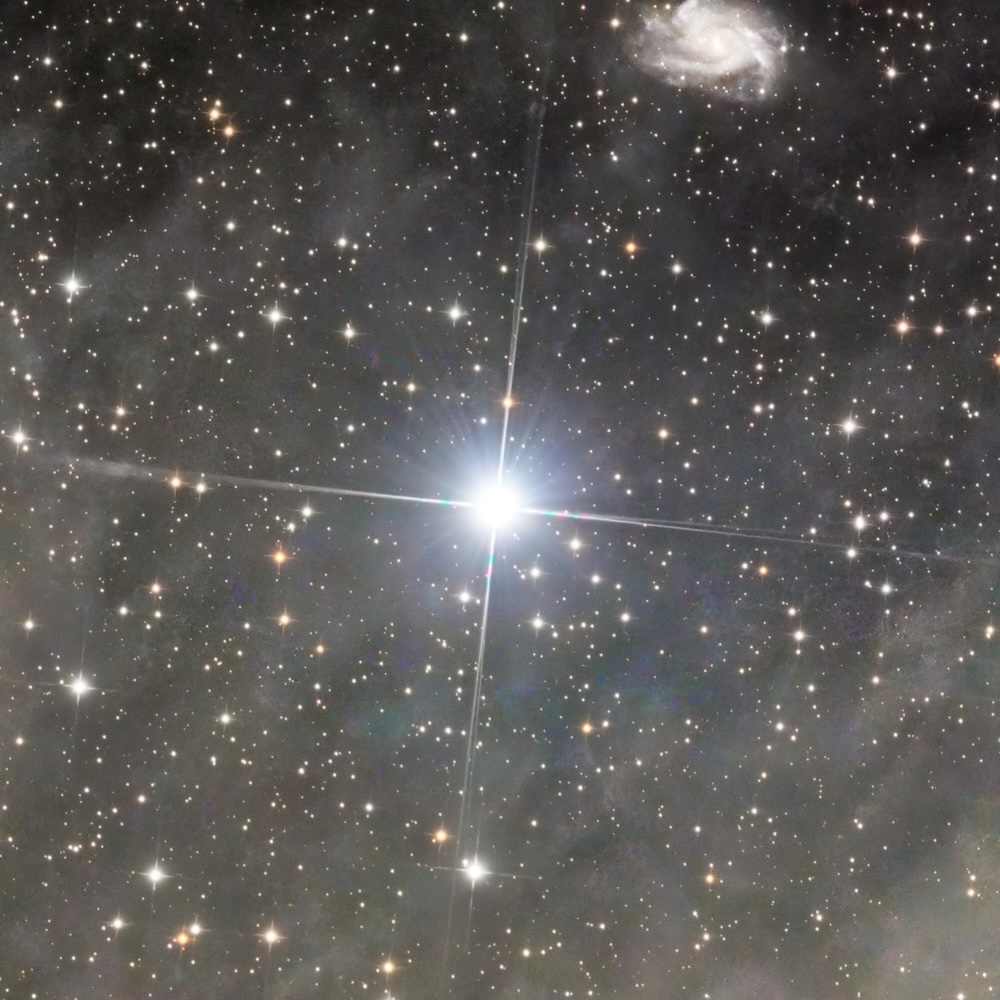
A Newtonian should produce a single cross-shaped spike at each bright star. This spike comes from the diffraction pattern of the spider-vanes that hold up the secondary mirror. Having multiple spikes suggests that the telescope’s alignment jumped halfway through the imaging session, probably at the meridian flip.
Since the camera and telescope are rigidly attached, a rotation in the diffraction pattern should also show up as field rotation. So to test this theory, I wrote code to batch-plate-solve all the subs in the Dark Shark run using ASTAP. Here is the result.
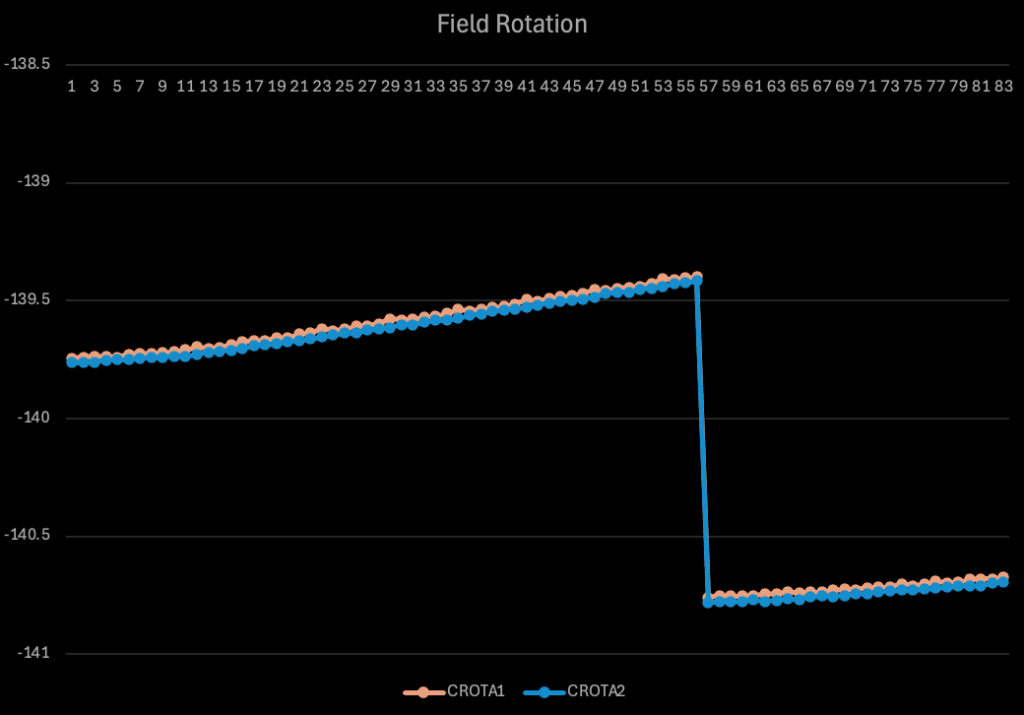
There is a big jump, around 1.5º, right after the meridian flip. In addition, there is a small drift that adds up to around 0.2º over half a night.
To compensate for rotation, I re-rotated the camera after the flip, when shooting the Question Mark Nebula. That mostly solved the image rotation problem, but it obviously didn’t help with the spikes — which makes perfect sense, since the spike pattern is generated upstream of the camera rotator.
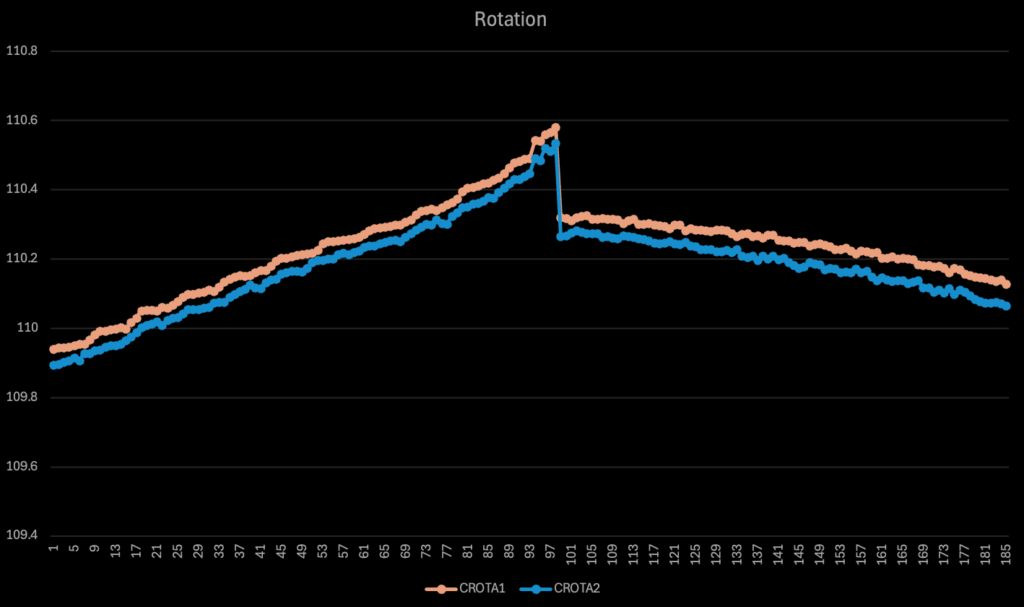
Therefore, it seems likely that there is some internal sag in the mount or tripod, which becomes noticeable under the Epsilon’s top-heavy load, even when (partially) counterweighted. In the future, I will test this theory this by imaging under lighter loads like my RedCat 51. If this is the culprit, perhaps I can solve it by fully counterweighting the mount. If not the tripod or mount, I really don’t know where else the problem could be coming from.
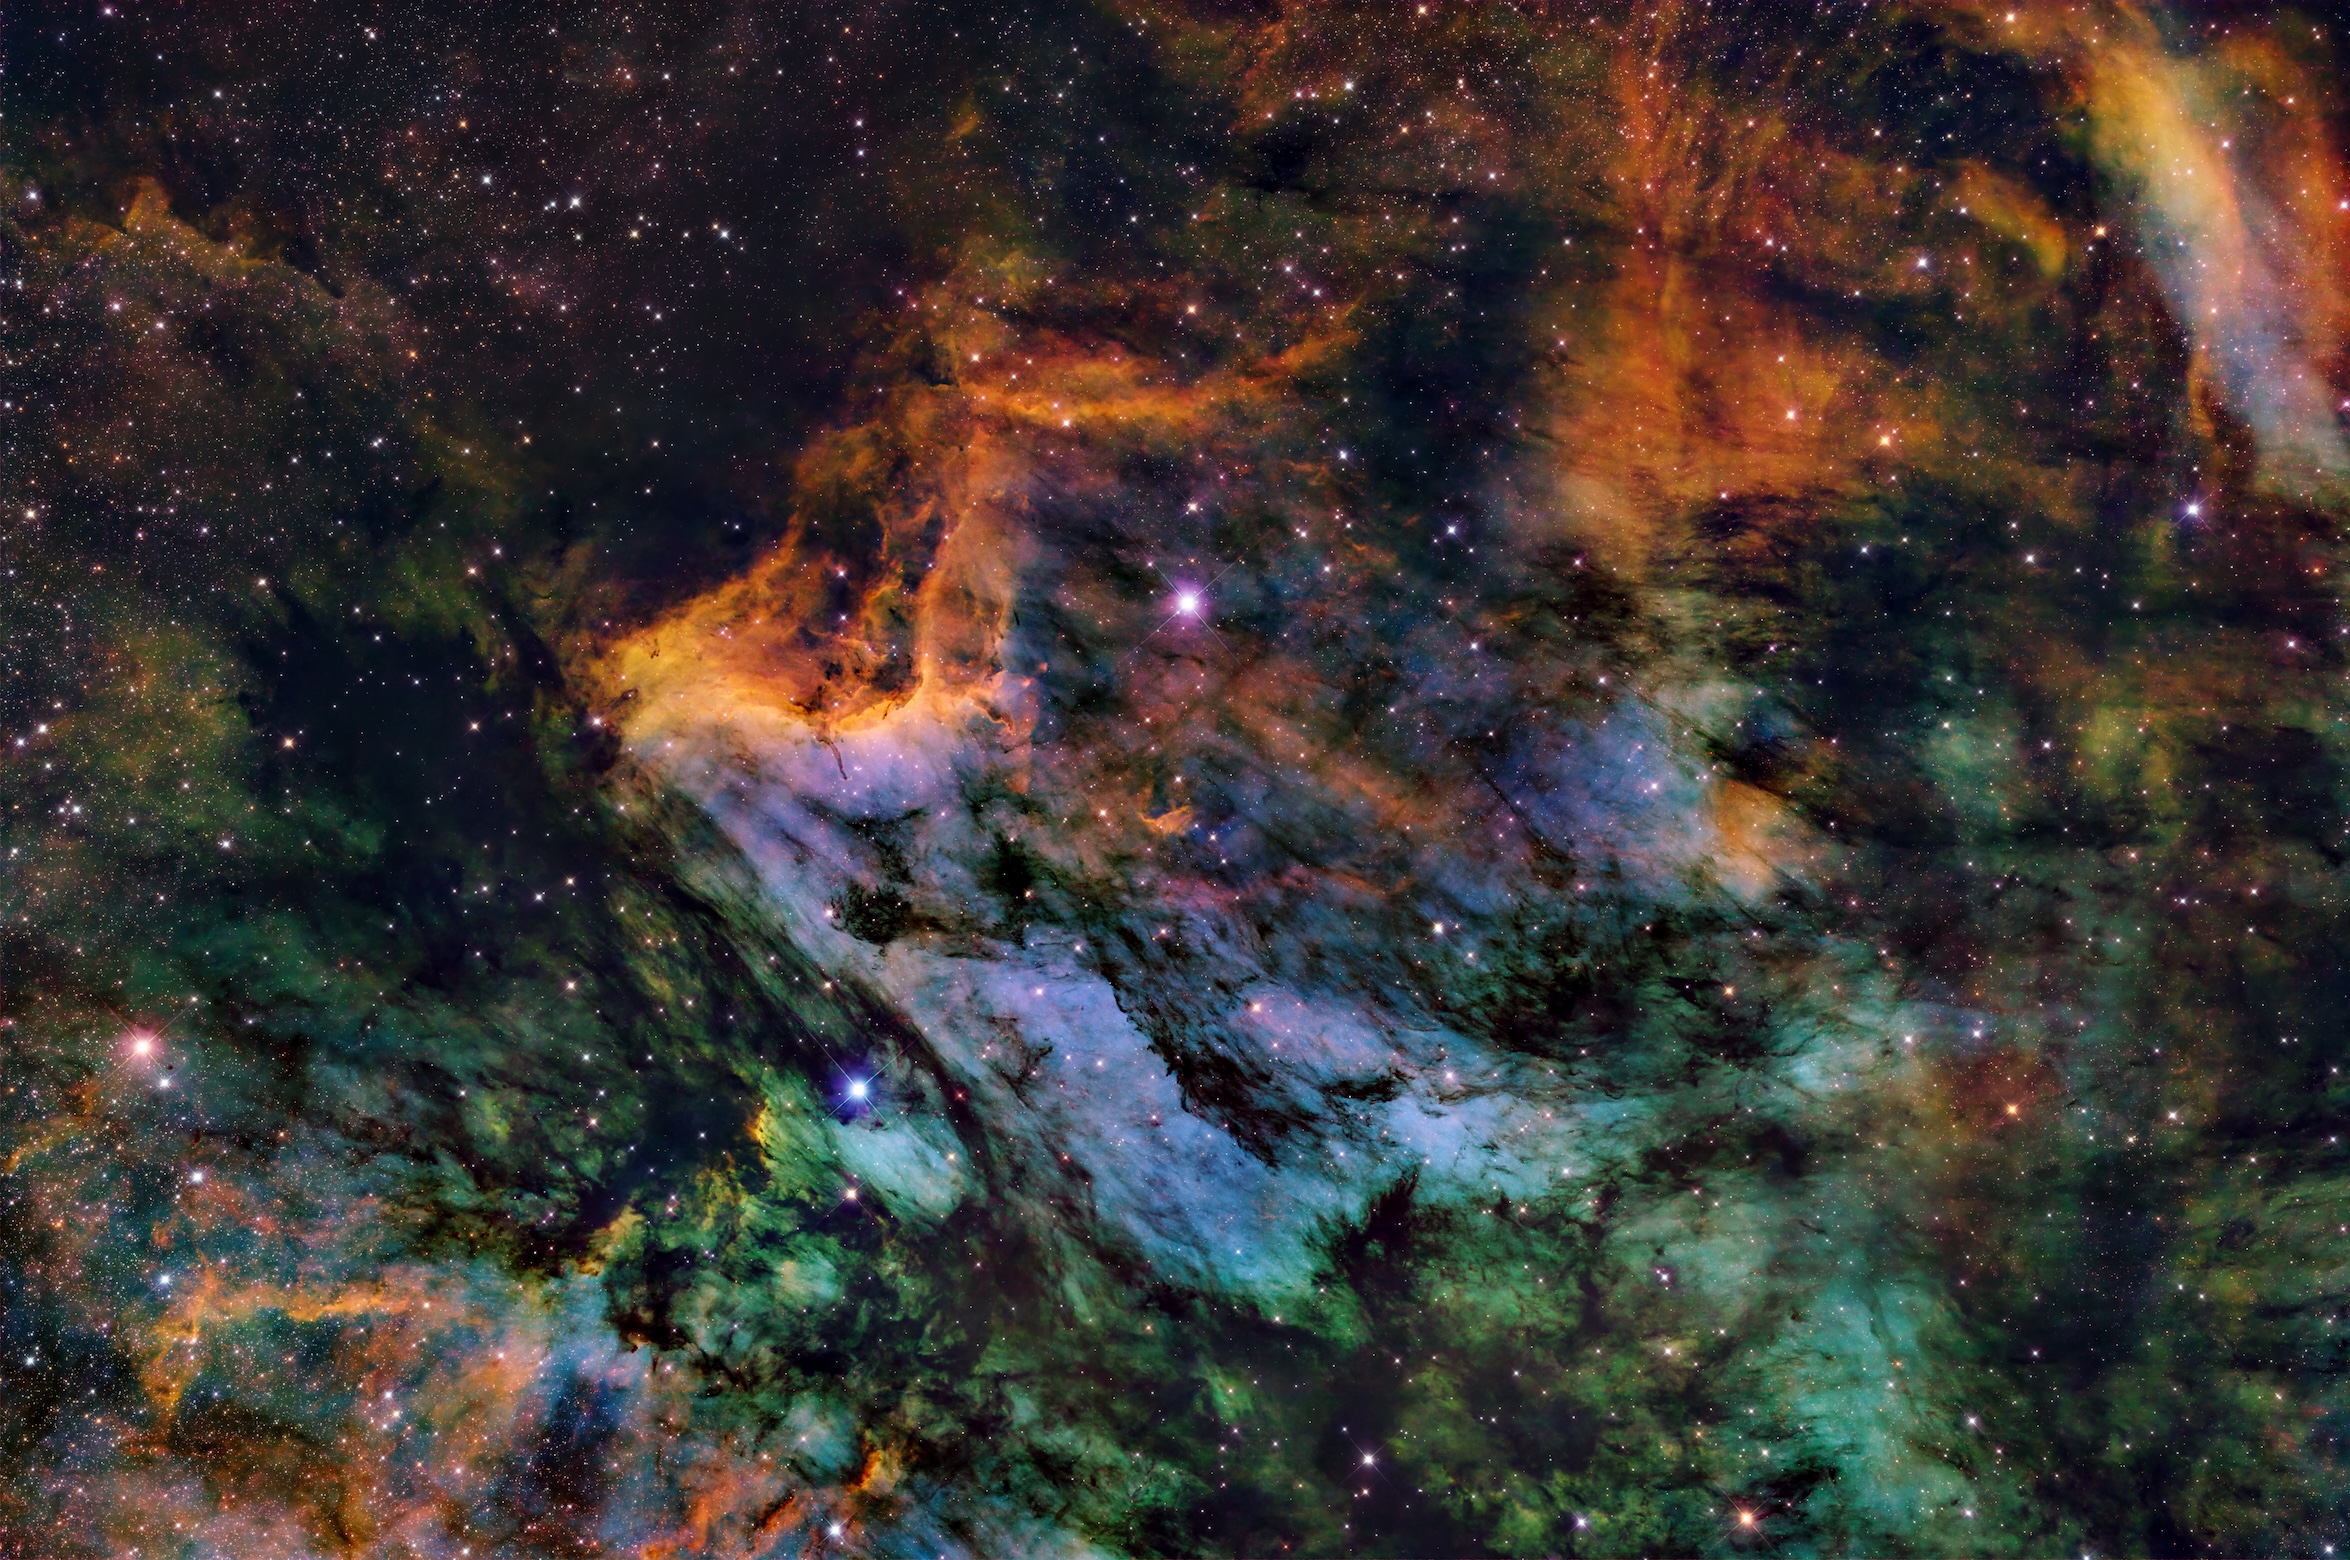
Pelican Nebula
The following night, the skies cleared again. Since the Question Mark had turned out well, and I didn’t expect more data to improve the image quality by much (it might lead to even more diffraction spikes!), I shot a new object: the Pelican Nebula in Cygnus. Last June, I imaged this object together with the North America Nebula using the RedCat 51. This was one of my first successful deep-sky astro targets.
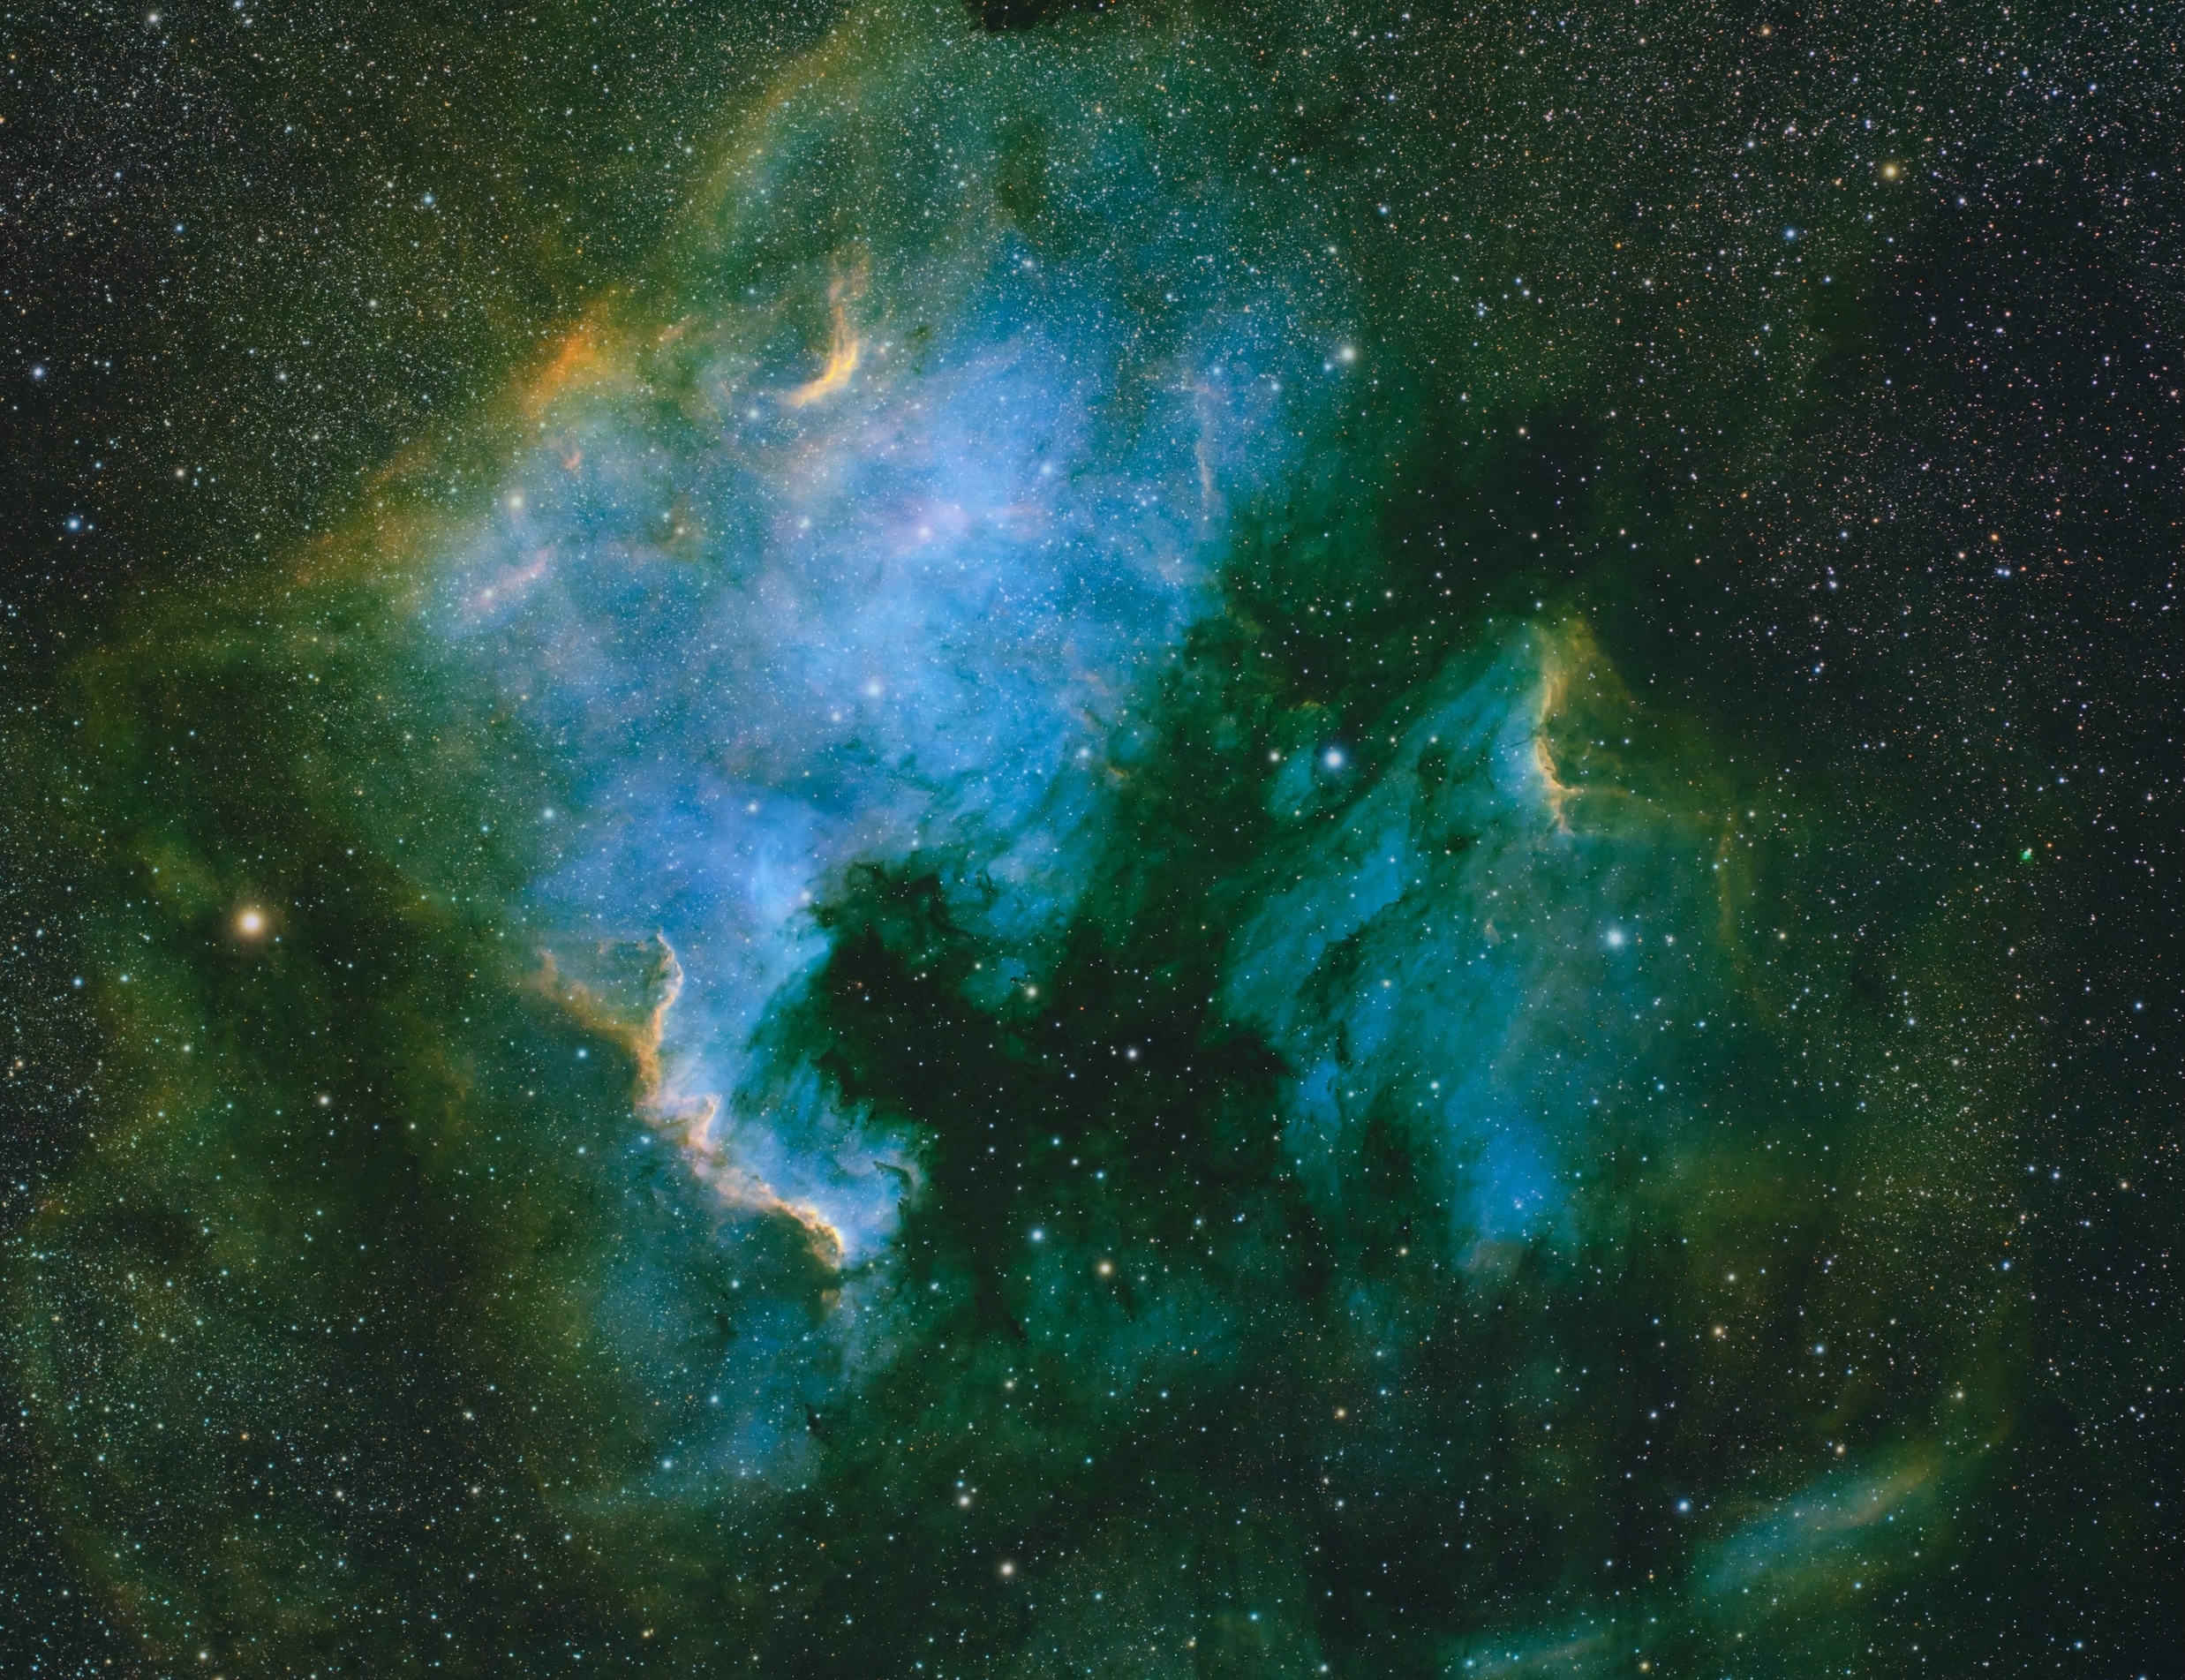
The North America Nebula is the object on the left. You can probably make out Mexico, Florida, Maine/New Brunswick, and maybe even the St. Lawrence river. And that dark patch under the nebula is the Gulf of … America? To the “east”, where Atlantis would lie, we have the Pelican nebula. Like the question mark, I don’t see much resemblance to a pelican.
Incidentally, the same night had a really good aurora. The lights danced along the northern horizon for at least two hours, and I captured a time lapse while taking a nap. For more on aurora, see this post and also this one.
Yesterday, again from my backyard, I shot the Pelican with the Epsilon, zooming in with 3x the RedCat’s focal length. I only caught 4 hours of data, limited by polar alignment issues early on, but that was enough! Here is the LRGB image; again, not bad for the city.
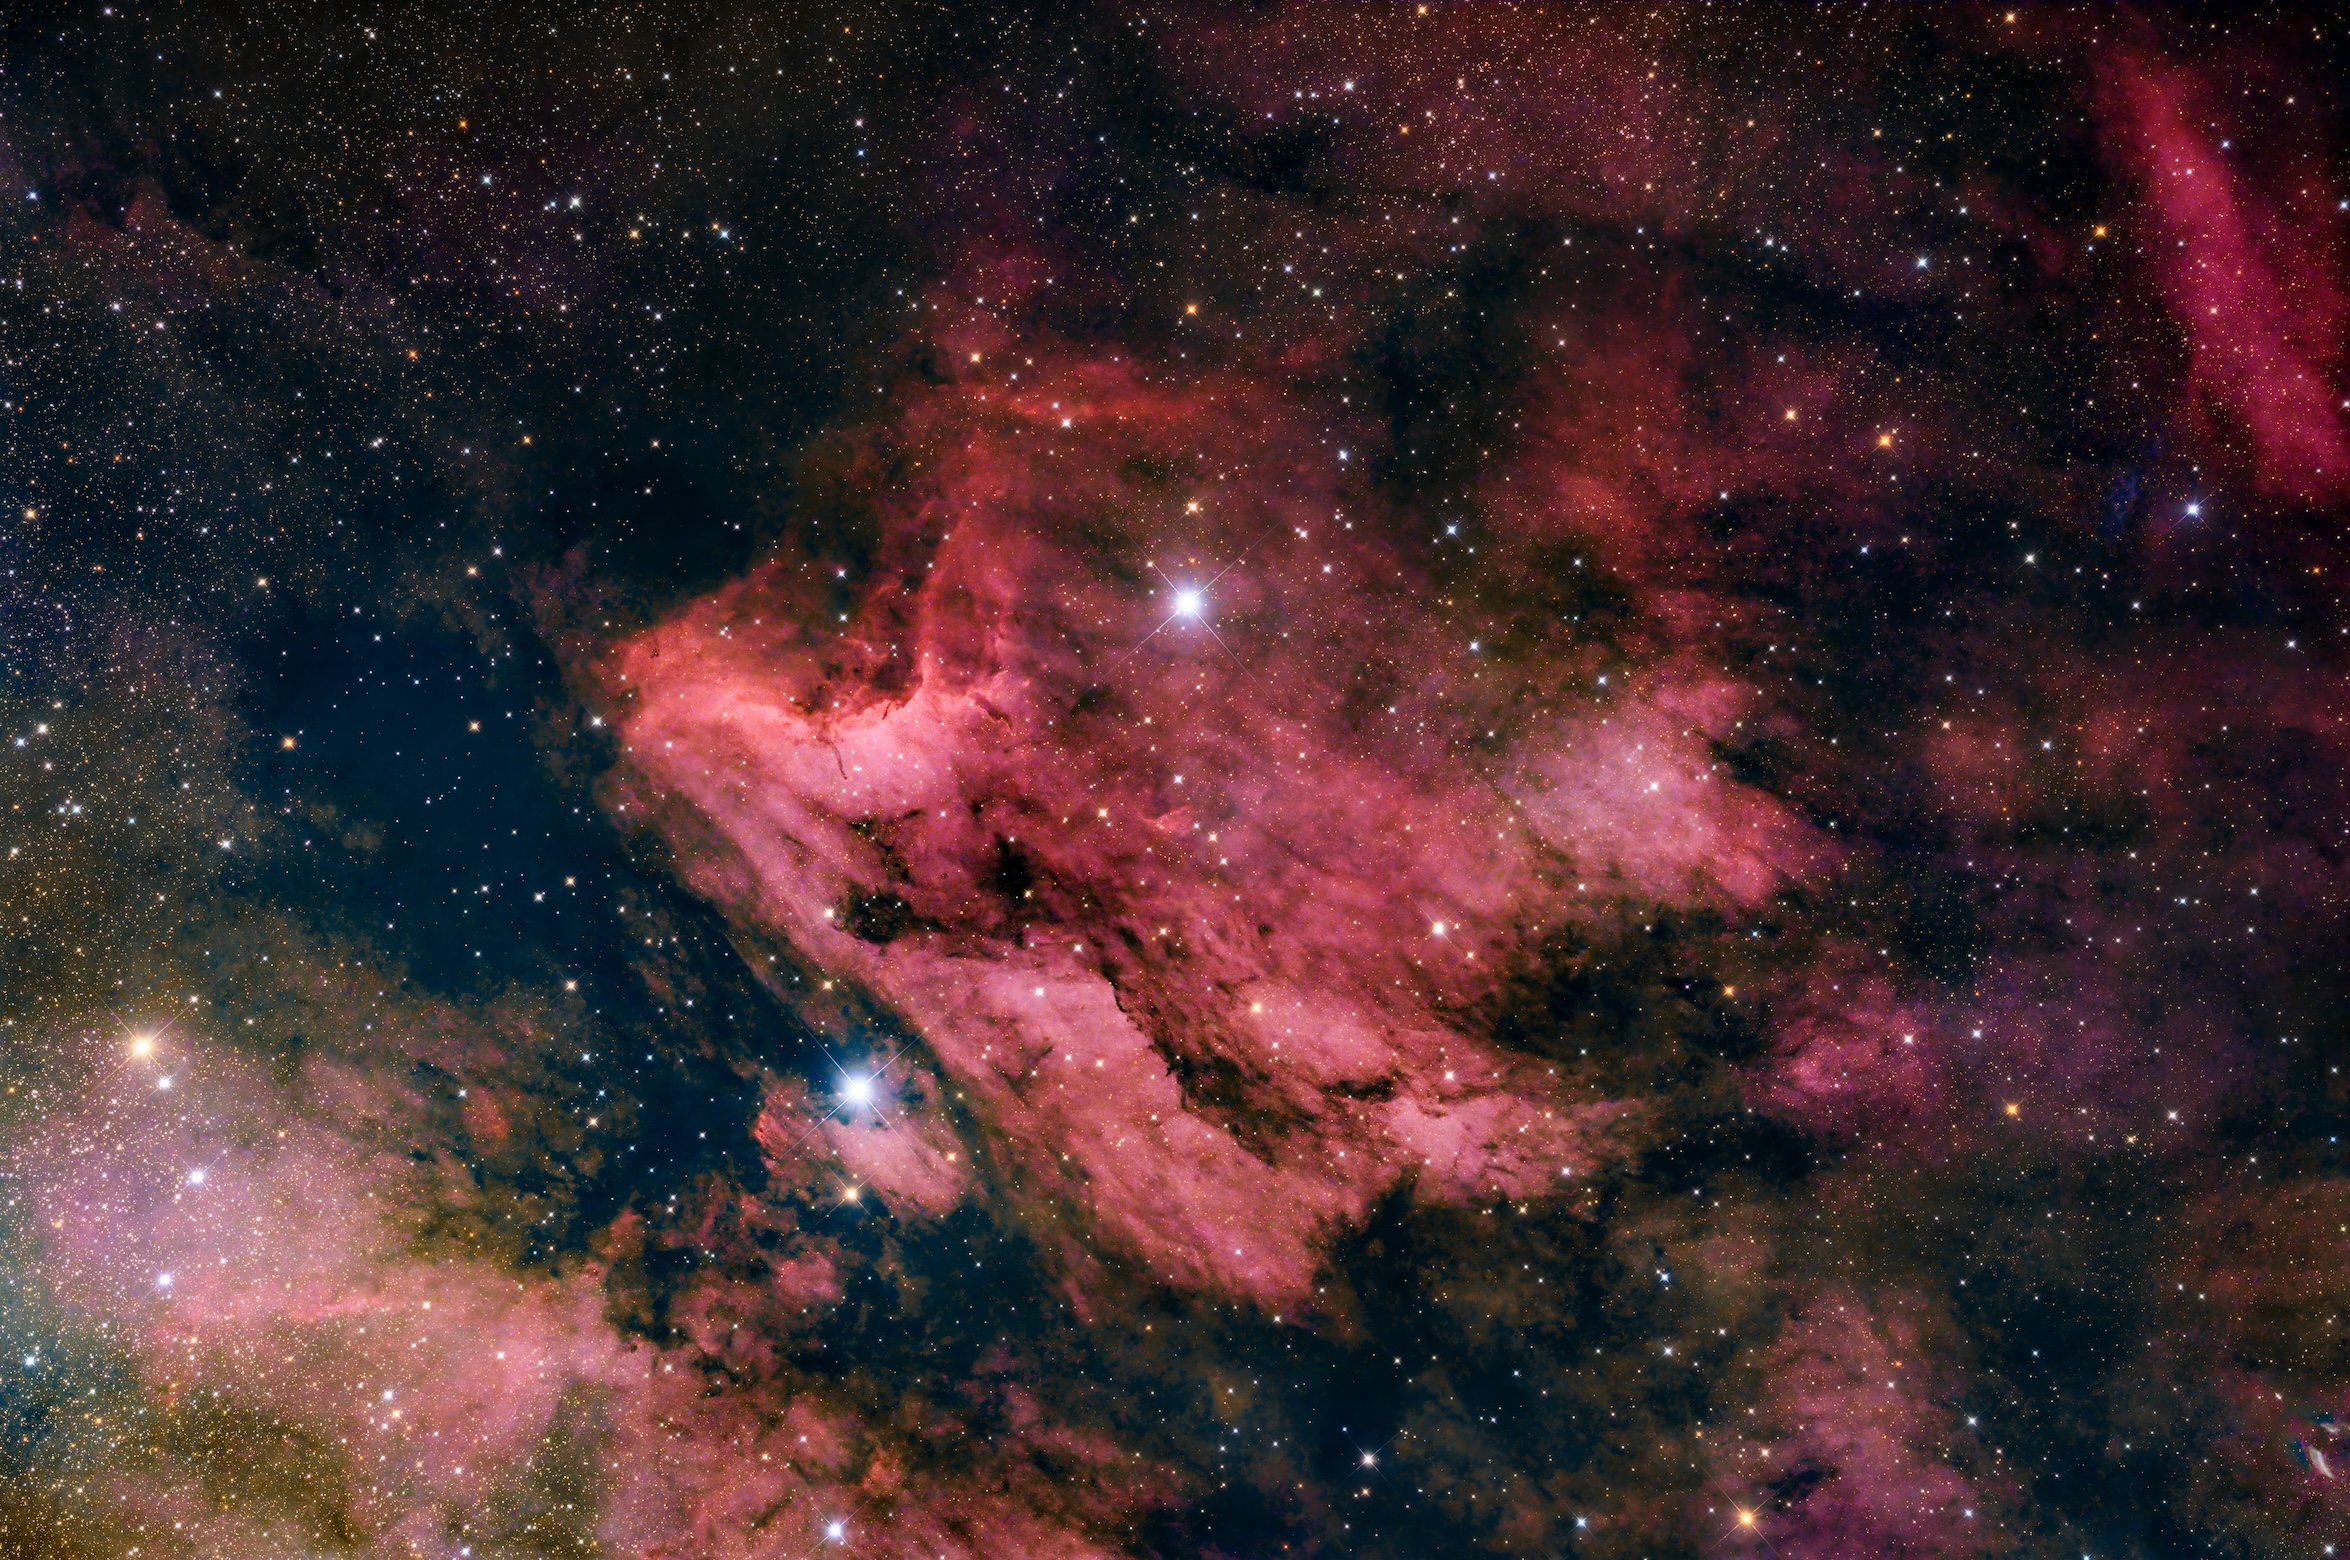
Here’s the SHO. I took pains to try to keep enough “green” without having it dominate the photo. Standard SCNR will produce a blue-and-yellow image, which looks clean, but doesn’t capture all the information. But too much green makes the nebula appear hazy. This is also an object that, given extra imaging time, could be improved on a bit. Some parts of the image are a little grainy and more data would help with that. Better seeing could also help with the fine details.
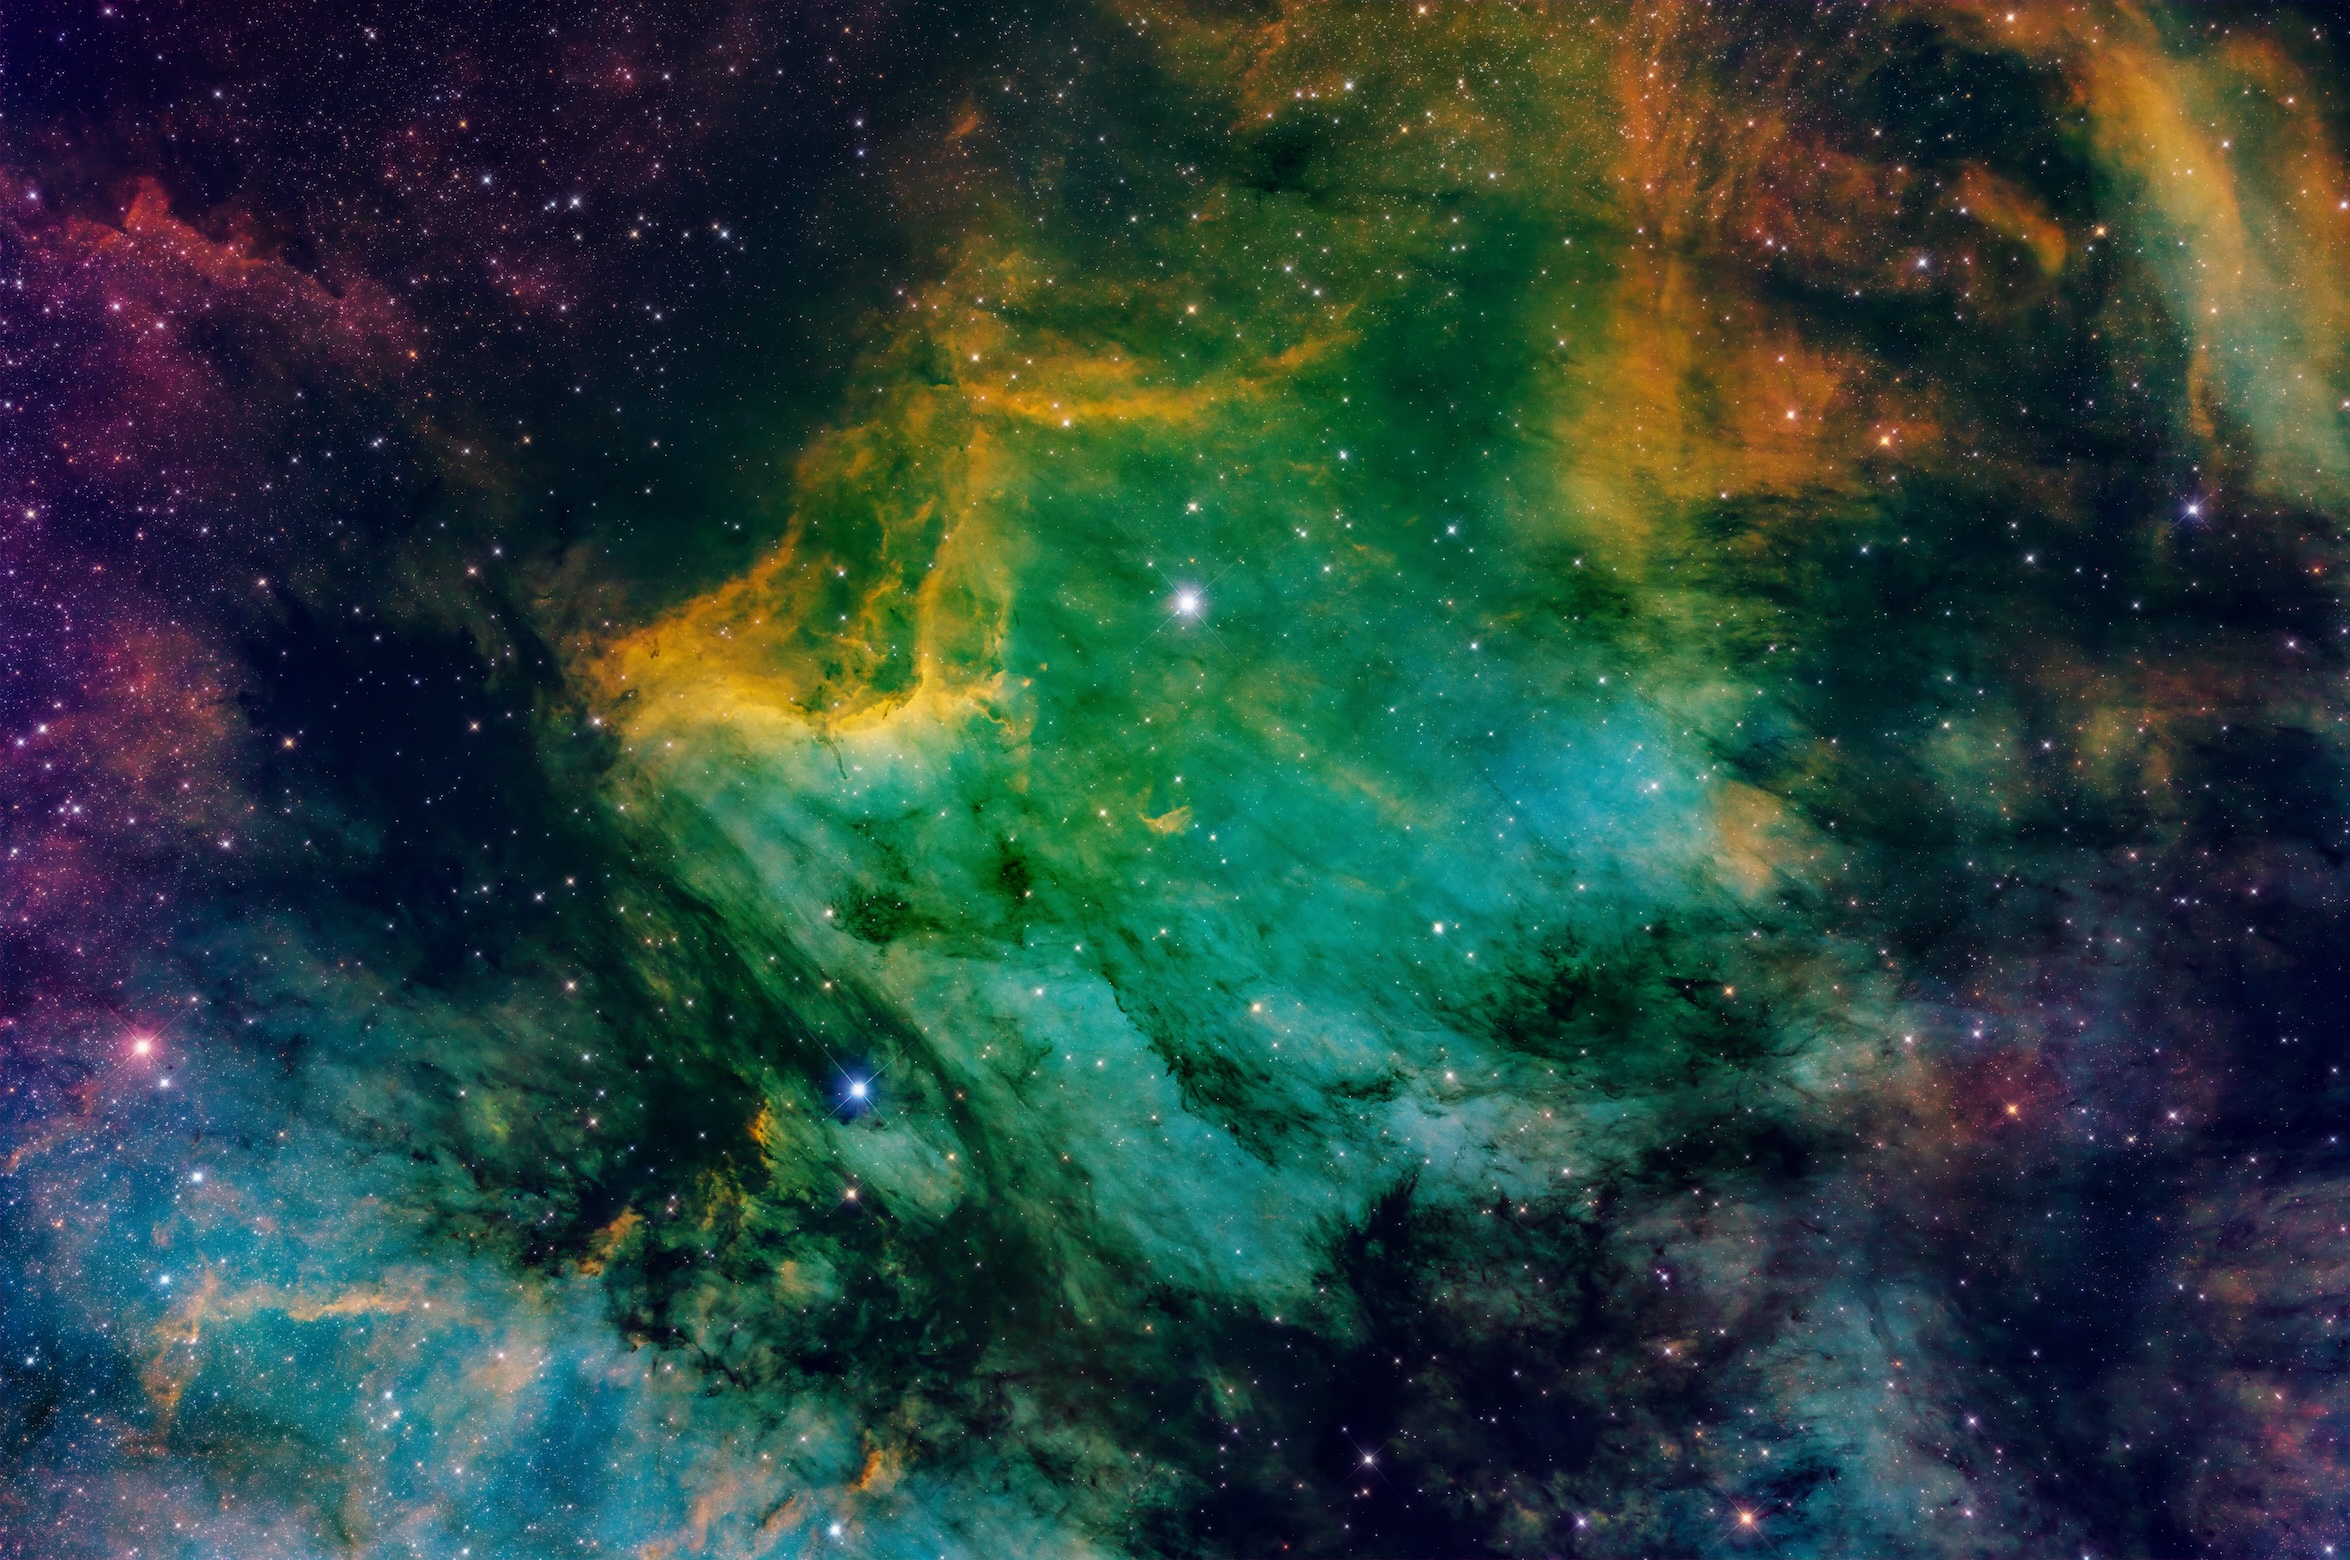
And my final image came about by mistake. In my post-processing, I use GraXpert to remove the gradients from the linear master files, after integration. I tried running GraXpert a second time after stretching and some curves, to remove some residual gradients, like (potentially) the red-purple glow to the upper-left of the SHO image. But by mistake, the GraXpert AI inferred that the nebula itself was one big gradient, and removed it instead!
Here is the product. A lot of fine details when you accidentally subtract the nebula’s average brightness! Of course, you don’t need AI gradient removal to do this; a wavelet or spatial frequency filter will work as well. But the AI result is pretty too.